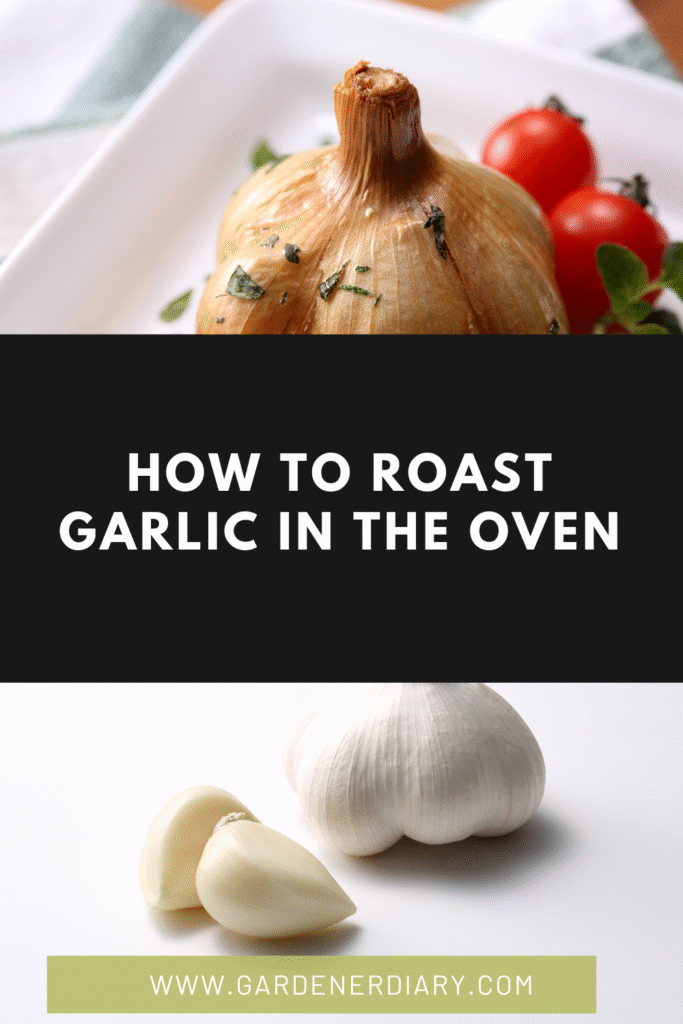
Roasting garlic in the oven is one of the easiest ways to turn sharp, raw cloves into soft, golden, buttery morsels of flavor. This simple technique transforms garlic’s pungent bite into a mellow, sweet, and nutty taste that can elevate almost any dish. Whether you mash it into pasta, spread it on bread, or blend it into creamy sauces, roasted garlic is a kitchen essential.
In this guide, you’ll learn the step-by-step method for roasting garlic perfectly every time, along with tips for storing it, using it in recipes, and even creating delicious garlic-based condiments like how to make garlic aioli or how to make garlic paste.
Key Takeaway:
- Roasting garlic transforms its sharpness into sweet, creamy richness.
- Use 400°F and roast for 35–45 minutes for perfect cloves.
- Roasted garlic works beautifully in sauces, spreads, and dips.
- Store in the fridge for up to 5 days or freeze for longer use.
Why Roast Garlic?
Roasting transforms garlic’s flavor profile completely. The high heat caramelizes the natural sugars in the cloves, turning their texture creamy and their taste rich and slightly sweet. This makes roasted garlic more versatile, perfect for adding depth to sauces, soups, dressings, and spreads without overpowering other flavors.
Some benefits of roasting garlic:
- Milder Flavor – Great for people who find raw garlic too intense.
- Creamy Texture – Perfect for spreading or blending into dishes.
- Extended Use – Works in sweet-savory combinations, from roasted vegetables to hummus.
Ingredients and Tools You’ll Need
- Whole garlic bulbs (choose firm, unblemished heads)
- Olive oil
- Salt (optional)
- Aluminum foil or a small oven-safe baking dish
- Sharp knife
- Oven
For more ways to prepare garlic, you might check how to peel garlic quickly or how to cure garlic for long-term storage.
Step-by-Step: How to Roast Garlic in the Oven
Step 1: Preheat the Oven
Set your oven to 400°F (200°C). This is the ideal temperature for caramelizing the garlic without burning it.
Step 2: Prepare the Garlic Bulbs
- Remove loose outer papery skin, leaving the cloves attached.
- Slice about ¼ inch off the top of each bulb to expose the cloves.
Step 3: Drizzle with Olive Oil
Place the garlic bulbs on a sheet of foil or in a small baking dish. Drizzle each bulb generously with olive oil, ensuring it seeps into the exposed cloves.
Step 4: Wrap or Cover
- Foil Method: Wrap bulbs in foil for softer cloves with a mellow taste.
- Baking Dish Method: Place bulbs cut-side up in a dish, cover with a lid or foil.
Step 5: Roast
Roast for 35–45 minutes, depending on bulb size. The garlic is ready when cloves are golden and can be easily pierced with a fork.
Step 6: Cool and Squeeze
Allow bulbs to cool slightly. Squeeze the base of the bulb to release the soft, roasted cloves.
Ways to Use Roasted Garlic
Roasted garlic is incredibly versatile. Here are some delicious ideas:
- Spread on bread for a richer twist on how to make garlic toast.
- Mash into how to make garlic sauce for pasta for added sweetness.
- Blend into how to make garlic aioli for a milder, creamier version.
- Stir into mashed potatoes or vegetable purées.
- Add to salad dressings, soups, or hummus for depth.
If you enjoy roasted garlic’s smooth texture, you might also like how to make garlic confit, which involves slow-cooking garlic cloves in oil for an even silkier result.
Storing Roasted Garlic
- Refrigerator: Store in an airtight container for up to 5 days.
- Freezer: Mash roasted garlic into a paste and freeze in small portions for up to 3 months.
- In Oil: Submerge in olive oil and refrigerate, but use within 1 week for safety.
Tips for Perfect Roasted Garlic
- Use fresh, firm bulbs for the best flavor.
- Don’t skimp on olive oil—it helps prevent burning and enhances flavor.
- For stronger roasted garlic, roast unwrapped for the last 5 minutes to slightly caramelize the tops.
Common Mistakes to Avoid
- Burning the cloves: Leads to bitterness; watch closely after 35 minutes.
- Not trimming the tops enough: Makes it harder for oil to penetrate and roast evenly.
- Using old garlic: Results in a mushy texture and less sweetness.